Season’s
Greeting to all my crafty peeps out there!
With
the Grace of Our Lord and Savior Jesus Christ’s blessing we will enter a new
and exciting new year! This has truly been a challenging year
for pretty much everyone. This year has also been a year of giving and
blessing one another. The natural disasters brought out the best in
all of us as a whole. It is everyday proof that God is always in the mix
and there is always hope. So before we say goodbye to 2017’s
Christmas Holiday I wanted to get a couple more projects in; after all it's the
12 days of Christmas. The first project is the ever popular
Hershey’s Nugget treat tray (not sure if that is the real name). This
little holder is sooo cute and so much fun to make. It’s quick, very
easy, can be made for ANY occasion, and of course my number one thing
in crafting...it's cost effective! I did five Hershey Nuggets but you can
easily adjust the measurements to accommodate more. I got the idea
from Tmika from Scrapdaworld, check out her tutorial on YouTube here .
Instead
of cutting patterned paper I used some peel-n-stick Christmas labels from
Wal-Mart, they worked out perfectly. You can also use holiday mailing
labels. Other supplies for this project are: patterned paper for the tray-Recollections’
Sugar Plums 6x6 pad, Recollections Celebrate-It treat bags, some balloon ribbon
(the kind you coil with the scissors), Spellbinders A2 Card Basic A (the long
rectangle at the top), and the sentiment is a stamp from Hobby Lobby (clearance
section). Here's a Tmika Tip: after you have the tray made and the
Nuggets wrapped use a dry adhesive to keep the Nuggets in place in the
tray. I also rounded the corners of my trays for a cleaner appearance.
I made borders for my trays (this is optional). Some of the
tutorials I watched did not make borders. They just attached the Nuggets
to a strip of patterned cardstock and slip them in the treat bag. The
borders make the tray a little more sturdy. I used Stampin’ UP! Real Red
classic ink to stamp my sentiment. The measurements for my
tray: 2 ½ “ x 5 1/8 “(5 Nuggets). The first time I tried this I did
not have any Nuggets so I used Hershey Kisses. The measurements I used
for the Kisses: a piece of cardstock cut to 2 7/8” x 5”, score at 1” and
1 7/8”, round the corners and there you have it! I think that holds 6
Kisses.
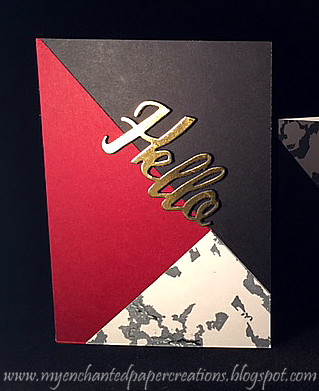
Okay…project
number two is a cute little box, called the “Impossible Gift Box”. I saw
this on The Paper Pixie’s YouTube channel, here is the tutorial.
It’s
not really that hard but it is a little time intensive, at least until you get
familiar with it. I made an uncut template, a cut template, a demo,
and a finished project in about 2- 2 1/2hrs, all of this was my first attempt
at the box, so the name is a little misleading...it’s not
impossible. The supplies I used for my box are: Recollections 65#
white cardstock for the box (it’s even better if you make it using heavier
cardstock like 80-100#). I used some old cranberry coloured heavy cardstock
from the first mat and some Christmas PAPER I had in my stash from Hobby
Lobby. The sentiment/greeting is from a Hero Arts stamp and die set
called “Merry”. I used Stampin’ UP! Cherry Cobbler classic ink to stamp
the sentiment and the Stampin’ UP! Window punch to create the shadow for the
sentiment. I had about 7-8 Hershey’s Nuggets in the box and then I
tried 4 Ghirardelli Squares both fit very well.
And
with that I will say to you and yours have a Happy, Prosperous, Safe, and
absolutely blessed New Year!!!
 |
| This little box is made with the lid attached |


The Duchess of the
Glenn
(Joyce)