Showing posts with label Embossing. Show all posts

Sunday, November 17, 2019

The 25 Days of Christmas Tags 2019- Day 14

Howdy folks.  
Let get it started with Tag or Day 14 of Tracy McNeely’s The 25 Days of Christmas Tags.  Click here to find out all the details.  Today’s sponsor is Paper Sweeties and my tag was inspired by Lindsey from the Paper Sweeties DT.  Click here to see her tags.

I really like the gold and silver embossing on the black tags she did.  I created my tag base using my Cricut Maker.  I used Our Daily Bread Designs’ Flourished Alphabet (Item #H675).  I believe Our Daily Bread Designs is now Divinity Designs.  I stamped the alphabet using Color Box white pigment ink, then heat embossed one in gold and one in silver.  I made the ribbon opening using a retired Stampin’ UP! Punch.  Of course, you can use any punch that makes a hole big enough to insert your ribbon of choice.  I just used that one because I saw it a couple of days ago when I was looking for something else…lol.    I added some black Chiffon ribbon and there you have it! Silver and Gold just like Burl Ives sang about in the Rudolph the Red Nose Reindeer Claymation…which be coming up soon.   See you tomorrow!  


Joyce


Saturday, November 16, 2019

The 25 Days of Christmas Tags 2019- Day 13


Hello All,
It's Day 13 of The 25 Days of Christmas Tags.  Thank you again to Tracey McNeely for putting this event together and to all the supporting sponsors and design teams.  For information on how you can participate click hereThe sponsor for today is CAS-ual Friday Stamps. 

For my day 13 tag, I was once again inspired by Carol.  A pretty little Christmas Tree stamped on a plain white background, one in red and one in green. You can find her tags here.

The supplies I used for my tag- Avery-Elle’s Stitched Rectangles, Stampin Up retired stamp set Evergreen, Stampin Up ink Handsome Hunter also retired, Color Box white pigment ink, and some white seam binding ribbon.   I stamped the tree, then used my pigment ink to stamp the Silent Night overlay, then I heat embossed it.  Quick, clean, simple, precious…works for me.  Well, mon amis that is it for tonight.   Thank you for stopping by and I hope you’ll visit again soon.   


Joyce

Friday, November 15, 2019

The 25 Days of Christmas Tags 2019- Day 12


Hello my friends, thank you so much coming back to see me.  We are on day 12 of The 25 Days of Christmas Tags hosted by Tracy McNeely. We are half-way through and I am still hanging in there posting a new tag each day!  There is still time to jump on board and just in case you are interested in doing so; you can click here for the details.  Today’s sponsor is STAMPlorations! 

My tag was inspired by Carol from the STAMPlorations design team.  Carol did two cute tags, just click on her name to check them out.  Tag 1-Stitched Snow Hills Reindeer and Tag 2 she called a Majestic Deer.  Both are really, really nice.  I especially liked the Majestic Deer.
  
My tag was made using the following supplies: Base tag is Craft cardstock cut with an Avery-Elle’s Double Stitched Rectangle Die, I used Basic Grey’s Jovial 6x6 pattern cardstock, and Hampton Arts #SC0712-Reindeer stamp and die set, The sentiment and the background are from the same stamp set.  The back ground is stamp with Versa Mark.  All edges (base tag, deer, and sentiment) are inked with Tim Holtz Walnut Stain Distress Ink, I used Gina K’s Amalgam ink to stamp the sentiment.  I completed the tag by punching a whole with my Crop-A-Dile, adding a 1/8” black eyelet, and adding some natural Jute.  Note: to make the Reindeer stand out, I cut  him out 2 times in Craft cardstock and once in the patterned cardstock and layered them together.   The sentiment is popped up on foam tape.  I love the rustic feel.  So pleased with this one!   I believe that is it for tonight.  Thanks again for stopping by.  


Here is a side view showing the dimension on the Reindeer


Joyce


Friday, November 8, 2019

The 25 Days of Christmas Tags 2019- Day 5

Happy Friday! and welcome back.  It is day 5 of The 25 Days of Christmas Tags hosted by Tracey McNeely and friends.  For more information and to join in on the fun click here.  Today’s sponsor is Reverse Confetti (RC).  The RC DT tags are so darn cute!  My tag was inspired by Kathy Schweinfurth, Lisa Henke, and Olga Matyushevskaya. Click the their names to go to their shaker tag post.  These ladies did “shaker tags”, just cutie-cute overload!  I think I’ve only made one shaker anything in my crafting career, so I thought it would be a good tag to try.   The supplies I used to create my little tag are: Michaels (Recollections) white cardstock and clear acetate, JoAnn’s red cardstock, JustRite Clear Christmas Mini Tags stamp set, Spellbinders Heirloom Reflections Ornament dies, silver trim (sticker), Stampin UP ticket punch (retired), silver elastic cord, micro-beads in red, green, and white, Silver Detail embossing powered, and a little Wink-of-Stella.  The micro-beads are very staticy (is that even a word? Noooo it is not!), so I created the well using foam tape plus I added some glossy accents.   Check out my little sparkling shaker tag below. Let’s go to the Hop! (showing my age…lol).   Chat tomorrow my friends… Oh yeah, until I can figure out how to correct my e-mail address when I link my tags, I'll have to put in my post manually...now that's a bummer-drag!  For any questions feel free to e-mail at mepc99@att.net.


Joyce


Sunday, December 10, 2017

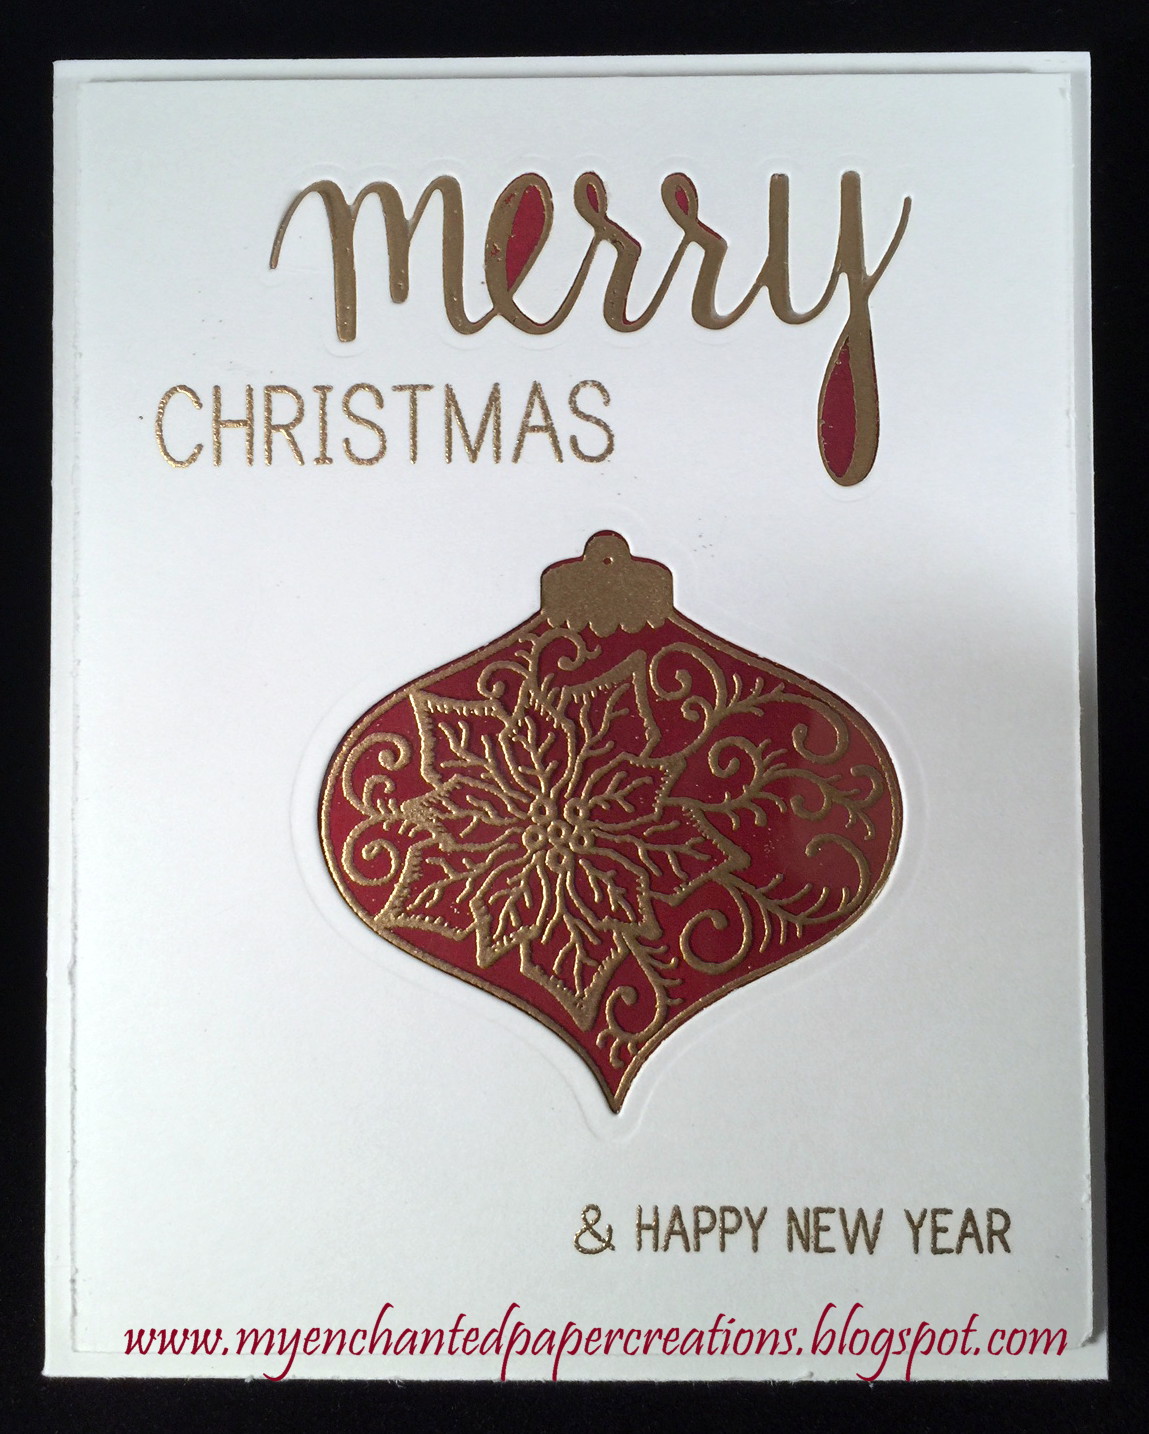
Stained Glass Stamping Christmas Card


Happy Holidays everyone,
Here is a Christmas card I made using a technique called Stained Glass Stamping.  You can find the video on Jennifer’s YouTube channel here.  Jen used some fall stamps for her card.  As you can see, you can use any matching stamp and die set.   The base of my card measures 5 5/8” x 4 ½” and made with 110# cardstock.  I’m not sure what size Jennifer’s card ended up being.  I did not pre-measure my card either, hence the crazy “5 5/8”.   The card front is ¼ inches smaller and popped up for dimension using 2mm fun foam.   The “Merry” is cut using the Hero Arts #DC170 “Merry” stamp and die set. The greeting is from the same stamp and die set.   The Christmas Bauble is cut using Spellbinder’s Heirloom Ornaments 2011 set.  The Image within the bauble die cut is a Heartfelt Creations pre-cut stamp set #3417 “Poinsettia”.  I embossed the image with gold embossing powder on heat resistant acetate.  The colour behind the die cut and stamp is a piece of white card stock that I coloured with distress inks.  I used Tim Holtz’s Festive Berries, Fired Brick, Candied Apple, and Aged Mahogany and then I heat set the colours.  The sentiment inside is from one of my favorite stamp lines Quietfire Design, #5858 “Gentle Thoughts”.   It looks difficult but really it was easy.  The only challenge I could see for anyone is finding some heat resistant acetate locally.    I actually got lucky and found some heat resistant acetate in my stash, that I bought from Judkins at a stamp convention in 2010!!!  I almost forgot to mention the matching envelope.  I made the envelope using my WRMK punch board, some Stampin’ UP! Cherry Cobbler card stock, gold embossing powder and the pre-cut Heartfelt Creations stamp set noted above.  I removed the Versa-Mark from the outline of the stamp, then stamped and embossed the inside image on the flap of the envelope.  Well folks that’s it for today.  I hope you’ll give it try.


Joyce
Related Posts Plugin for WordPress, Blogger...